Making an APA Paper with Microsoft 365
Microsoft 365 is an online word processor which is available free for everyone at Ashland University. To get access for the first time, follow this link. After your first time, assuming you are on the same computer, you can simply click this link: www.office.com.
(Note: This online program, formerly known as Microsoft Office, is completely different from the version which downloads to your computer. These instructions are only for the online version.)
Getting Started
The official MS 365 template for an APA paper is really the template for a paper which will be submitted to a professional journal; the student APA format is much simpler, so I have written a new template. Unfortunately, MS 365 doesn’t allow new templates, so we are going to trick it a bit:
- Click this link to download the APA template. It is an ordinary docx file (which means it has no protection against modification), and it will land in your “Downloads” folder. You want this template to be protected against accidental changes and Microsoft 365 won’t let you add that protection, so:
- Move the file to a better location on your computer.
- Right-click the name and choose “Properties.”
- In the “Attributes” box, select “Read-Only.” The template won’t be protected after is is uploaded to MS 365, but your clean copy will stay on your computer.
- Open Microsoft 365 and find the ⤒ Upload link on the right. Click it.
- Upload the template file. Its name is APA-template.docx.
- When you are ready to type an APA paper, open APA-template.docx and click the “File” drop-down menu. Choose “Save As,” and within that menu, choose “Save As” and come up with a new name for your file. (Note: The default file location is called “Documents,” but they don’t mean the Documents file on your computer. They mean OneDrive.)
- Now you can insert your own material into the new file.
The program will automatically figure out line endings and page endings, and will place the page number at the top of each new page.
Two More Refinements
Long quotations
APA requires you to indent long direct quotations (40+ words). Here is how to do it:
- Before the long quotation begins, press the <Return/Enter> key to start a new paragraph.
- Type the quotation but don’t put quotation marks around it.
- Finish with a period, then put in your parenthetical citation.
- Press the <Return/Enter> key to start a new paragraph.
- Type at least a little bit of the following material.
- Highlight the quotation and tag it with “Quote.”
Forcing a new page
APA needs a new page to begin after the title page, after the abstract page, and before the References page. Simply holding down the <Return/Enter> key and hoping for the best is very unreliable. Here is a better way:
The paragraph styles for “Abstract Title,” “Body Title,” and “References Title” are all set to force a new page to start. If you do not choose to use one of those paragraph styles, you can use one of the techniques below:
- Place your cursor at the very end of the previous material and drop the “Insert” menu down and choose “Page break.”
- The Apple keyboard shortcut for Page Break is ⌘ + Return.
- The Windows keyboard shortcut for Page Break is Ctrl + Enter.
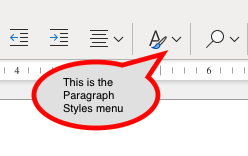
Managing the Paragraph Styles
- Paper title: Cover Page (Boldface)
- Cover page information: Cover Page
- Abstract title: Abstract Title
- Abstract body: Normal
- Paper title (inside): Body Title
- Body paragraphs: Text Body
- Indented long quotation: Quote
- References page title: References Title
- References page entries: Bibliography
Downloading Your Paper for Blackboard
Microsoft 365 has several options for sending the document to others; unfortunately, most of them don’t work properly with Blackboard.
Things you don’t want to do:
- Don’t click the blue “Share” button at the top of the page.
- Don’t choose “Share with People.”
- Don’t use Word’s “Export” function.
How to do it:
- Go to the MS Word “File” menu on the left. (It might be the lower of two.)
- Choose “Save as.”
- Select “Download a copy.”
- A docx version should land in your computer’s “Downloads” folder. This is the one to upload to Blackboard.
The views and opinions expressed in this page are strictly those of the page author.
The contents of this page have not been reviewed or approved by Ashland University.
Revised 12/7/22 • Page author: Curtis Allen • e-mail: callen@ashland.edu.